Air's Rock, located in the heart of Osenia, is perhaps the largest dungeon-style location of all.
Air's Rock is a dungeon in Golden Sun: The Lost Age that is traversed so that the party can obtain the Reveal Psynergy. It lies in central Osenia, to the north of Garoh in the middle of what appears to be a large desert. Unlike the Lamakan Desert, Suhalla Desert and Yampi Desert, the player does not enter a non-overworld area as soon as they enter the yellowish-brown area of land (which represents the desert on the overworld).
The name Air's Rock is a play on the real-world Ayers Rock, a large fold-mountain in the center of Australia that all the Elemental Rocks resemble to a degree. The real world version now more commonly goes by its native name, Uluru, however, and does not contain a network of tunnels and caves inside of it.
General
Air's Rock is the Elemental Mountain of Wind, and most of the puzzles are based around manipulating Air to some degree, and the Psynergy found within, Reveal, is a Jupiter Psynergy.
In spite of it being explored early on in The Lost Age, Air's Rock is the most massive, time-consuming dungeon-style location in the entire Golden Sun series. To give an idea of its scale, the first part of the dungeon is to climb the mountain's puzzle-heavy maze-like exterior from its base to its top portion, and this portion is longer and more involved than most dungeons in the original Golden Sun. Then in the interior portion, the expansive layout is effectively designed to be two intertwining "dungeon paths", each one about as long as the exterior portion to complete.
Although players are expected to visit Air's Rock before gaining Piers, contrary to popular belief it's possible to skip Air's Rock and come back later with Piers in your party. Although this makes Air's Rock easier to complete, getting through the Gabomba Statue is more difficult without the experience and equipment gained from Air's Rock, and Piers will be a higher level than the other characters. Players will eventually need to come back to learn Reveal in order to complete the game. Interestingly enough, even if the player chooses to skip Air's Rock and the meeting with Maha, Sheba will still mention meeting werewolves upon setting out to sea on Piers' ship, despite the fact that the player has not met any werewolves. The meeting with Maha is unchanged from having Piers in your group, except for a single line from Kraden introducing Maha to Piers (along with everyone else).
In Alhafra, if one goes to the top most room of the Mayor's mansion, there is a man the player can talk to who asks if the player can see Air's Rock, and when the player answers yes to his question, Felix automatically walks over to a window, and the game shows the player an overworld view of Air's Rock.
Items and collectibles of good mention are the Storm Brand, Fujin Shield, Clarity Circlet, and the Flora Summon sequence.
Story
Air's Rock, located in an arid desert in Osenia, is the elemental mountain of Wind, and as such is stated to have stood on the world's surface since the world's beginning.
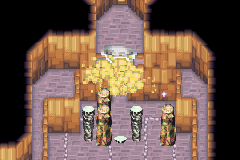
In the town of Garoh, many of the lycanthropian residents have powers aligned with Jupiter Psynergy, and while the player traverses the dungeon they encounter a large Psynergy stone at its heart, similar to the one located in Vale. After completing the dungeon, the player travels to Garoh where they use their newfound power of Reveal to gain entrance to a hidden series of caves underneath the town where they talk to Master Maha, a grand old werewolf who had traversed Air's Rock and gained the Reveal Psynergy, losing his ability to retain human form in the process. In a conversation with Maha, it is suggested that the strong winds emanating from Air's Rock probably carried particles of Psynergy stone to Garoh, which in turn gave the inhabitants their Jupiter Psynergy.
Walkthrough
Air's Rock can be accessed and cleared as soon as you enter the continent of Osenia to begin with. It is suggested to set the Move and Whirlwind Psynergies to your shoulder-button shortcuts, as both will be used a lot throughout the dungeon.
The Base of Air's Rock
The Whirlwind Psynergy is key to the majority of this dungeon's puzzles.
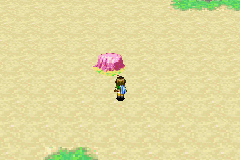
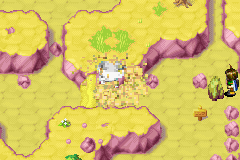
As you enter the Air's Rock location, the first screen you come across is a sandy maze on ground level at the base of the Rock. The brown stone you first come across, a Wind Stone, is an object that one uses the Whirlwind Psynergy to interact with; when one casts Whirlwind on it from any of the four compass directions, a large, powerful whirlwind is generated and sent out in the direction Felix is pointing, and the shooting out of these whirlwinds is integral to many of the dungeon's puzzles; case in point, walk up to the Wind Stone to the right of the wooden sign, and cast Whirlwind to blow a large whirlwind upward, which will clear away the sandy wall blocking your path. Go up, left, down, and left, and use the Wind Stone to blow a large Whirlwind down and clear a sand wall at the southwest corner of the area (where a chest you will get later is visible. Now proceed northward until you get to a set of rocks with a lone chest nearby. This chest is a Mimic that yields a Lucky Medal when defeated.
From where the Mimic just was, go down the path to the right, then go right at a T-junction leading up and right, then at another set of forks immediately after that, go right, then up, and use the Wind Stone at the upper right corner of the area to blow a large Whirlwind left and clear away a sand wall. Head consistently down to the lower right corner of the area, and use the Wind Stone there to blow a large Whirlwind left and clear away a sand wall. Go up to where a bunch of purple rocks are randomly scattered across the ground, walk counter-clockwise around them and down, and you will be led to another Wind Stone, one that you can only shoot upward with from your position. Use this stone twice in a row this time, for two sand walls will be cleared away.
Retrace your steps all the way to where you fought the Mimic, and go down from there to a multi-path junction and go right to end up in the area where those two sand walls just were. Go up to claim a treasure chest containing a Cookie, then go down and left to the first Wind Stone near the dungeon's entrance - but now you'll be facing it from the right. Use the Wind Stone to blow a large Whirlwind left and clear the visible sand wall to the left. Retrace your steps to the multi-path junction, head back down to the dungeon entrance, take the now-opened left path, claim the chest at the lower left corner of the area containing a Smoke Bomb, use the nearby Wind Stone to blow a large Whirlwind up to clear away a sand wall. Make your way counterclockwise so that you'll be just above this same Wind Stone, and you will be led to the top center of the area where a large purple whirlwind-shaped structure is located. Cast Whirlwind on that, and a spectacularly huge tornado will clear the sand off the wall and reveal a twisting set of wall-ladders, which leads you to the next screen and the first of the actual exterior "floors" of the rock.
Climbing Air's Rock
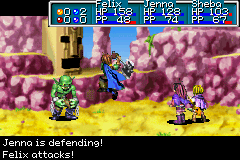
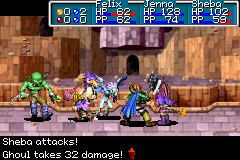
A battle in the outside portion of the mountain.
In this new screen, go left, climb up, and take the left of the two visible wall ladders. Slide down a cliff slide at the top to where a whirlwind-spouting Moai statue is facing you from the left, and its Whirlwind will pick you up and drop you off to where sliding down two more cliff slides lets you to a place where another whirlwind-spouting Moai head at the left will transport you right. Push the earth pillar two spaces left onto the gray square on the ground, then go right and push another earth pillar two spaces right onto a gray square. Ignoring the wall ladder below and the forking wall ladder above, go right to find another wall ladder leading below, and use this to get to a chest in the base screen containing the Storm Brand, a powerful and useful weapon for Felix at this point in the game.
Return to the forking wall ladder, climb up its right fork, then at the floor area you will reach climb down the wall ladder to the right. A whirlwind-spouting Moai statue to the right will transport you left. At where you dropped off, if you check left, you'll find a Frost-able puddle next to an out-of-reach chest; this chest is only relevant if you happen to be playing this dungeon after recruiting the Mercury Adept Piers later in the game, who is the only one that can have the Frost Psynergy. The chest contains a Vial. Otherwise, climb up two wall ladders, push an earth pillar one space right to make it drop, then wait a moment until a whirlwind being spouted by a Moai head far off screen to the right takes you left to an area where climbing up another wall ladder leads you to the next screen of the Rock's exterior portion.
In a screen where several whirlwind-blowing Moai are visible at once along with a treasure chest, the tall wall ladder that is immediately visible is essentially a climbing gauntlet, for it is flanked by four Moai heads along the way to the top of the area that will send you back down to the ground level if their whirlwinds make contact with you while you're climbing. Timing is necessary. Upon successfully making it to the top, then slide down a cliff slide so that you land right next to an earth pillar. Push that one space right, grab the nearby chest with a Sleep Bomb, then stand on top of the Moai head lying flat on the ground. Its whirlwind will transport you all the way back to the top of the screen. Exit the screen right to enter the next exterior area.
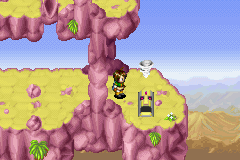
At this point in the exterior of Air's Rock, Felix has climbed up many, many stories off the ground level.
Now in an area where the sky is visible in the background, climb up, take the left fork, then at the next fork go right and down to where the two earth pillars are. Cast Move to move the left pillar one space left, then climb back down and go to the ledge immediately below that. Go right, slide down a cliff slide, then stand on a floor-based Moai head to the right. Where it transports you, go left to where the two earth pillars are, and use Move to remotely move the right pillar one space left. Hop left to the now-free space, slide down the cliff slide, and a floor-based Moai's whirlwind takes you to a higher ledge. Climb the wall ladder to the right, whose path leads you to a screen with flowing clouds going across it. Cast Move to move the lone Earth Pillar one space left. Immediately retrace your steps to where the whirlwind had deposited you, slide down the right cliff slide and the cliff slide below that, go left and climb the wall ladder all the way up to where it eventually leads you - the same screen with the fogs, but now with the earth pillar no longer blocking your way to the purple whirlwind structure. Use Whirlwind on it to clear the fog - now the two wall ladders leading up off the top of the screen won't bring you back to the bottom of the screen, but instead let you get to the next screen as typical.
But rather than take the left of the two wall ladders up to get to the next screen, go back down to the area with the visible background and the moai heads and re-do that entire screen so that you can return to the formerly-foggy screen from the right end, and the right wall ladder leading up becomes accessible. This leads you to a chest containing the Fujin Shield, a powerful piece of defensive equipment for Felix. Then once again retrace your steps and do what is necessary to get back to the formerly-foggy screen from the left end, and now take the left wall ladder up to make it to the summit of Air's Rock. A purple whirlwind structure at the top end of this screen, when used, prompts several powerful lightning bolts to drop out of the sky and blow open an entrance in the middle of the ground into the interior portion of Air's Rock. With the exterior segment of Air's Rock now complete, enter the doorway to begin the second, even larger portion of the dungeon.
Air's Rock Interior
A Psynergy Stone is present, so use your healing Psynergy to fully restore your HP before using the Psynergy Stone to restore your PP. Note that from here on out, whenever you cast the Retreat Psynergy in the interior portion of Air's Rock, you will be deposited back at this spot rather than the exterior, which can be very helpful at later points. Despite this room's twists and turns it is relatively straightforward to go through this full screen and leave out of its downstairs doorway to its upper left, since none of the features in the large left room such as the Moai statues and the earth pillars can properly be interacted with.
The room you emerge down into is a colossally tall screen with all sorts of doors and whirlwind-spouting Moai statues below, which will be dealt with in an orderly fashion later, but you are limited to its top part right now, where to your left and your right are doorways with tiles at their bases with colored "dots". This location is a primary "fork" in the dungeon that the rest of the interior dungeon hinges on; each of the two doors leads to a "dungeon path" that snakes its way through the complex dungeon below, intertwining with the other door's "dungeon path" without actually crossing over into it. These two "paths", each of which could suffice as a complete dungeon by the relaxed standards of the first Golden Sun, are consistently separate. Rooms inside the gigantic dungeon are also marked with tiles colored to indicate whether you're on the dungeon's eastern half (red) or the western half (blue), and as you progress through a dungeon path you'll be crossing over from one colored side to the other. Furthermore, the number of dots on each tile indicate how many floors down from the peak of Air's Rock you currently are, and at the moment the two-dotted tiles indicate you are two floors down. Knowing these facts should give the player a relatively secure sense of orientation while making one's way through the complicated and immense interior of Air's Rock. Enter the door to the right, the one marked with a red-colored tile, and you thus begin the dungeon's "Red Path portion".
The "Red Side Path"
Solving one of the more difficult puzzles inside Air's Rock.
Follow the path around to where a complex puzzle involving various pillars is present in the screen's top-right area. The idea is to arrange the pillars as such that you can cross to the elevated, narrow ledge to the right, while the Pound-able pillar immediately below the sand wall is kept flat on the ground so that it won't block the Wind Stone below. Move the bottom left earth pillar two spaces right and one space up, Pound the right gray pillar, and Move the upper right earth pillar one space right and one space down so that it covers the Pounded pillar implanted into the ground. That is all you need to do; after hopping across the pillars, go down to the Wind Stone and use it to blow a large Whirlwind up and clear away the sand wall. Make your way back to where the sand wall used to be, climb up to another Wind Stone at the top, and use it to blow a large Whirlwind down to clear away a sand wall below. Now make your way to where that sand wall used to be, and follow to it to where a lone earth pillar is to be pushed left to a square-shaped indentation on the ground. Go up, left, and down so that you can now hop across the pillar down and left, and access the stairwell to Floor 3 of the Red Side.
In Floor 3 of the Red Side, follow the path up and right - along the way, you should notice a Summon Tablet in an enclosed space below you. You cannot get this until much later. Move an Earth Pillar out of the way of an air spout in the wall, subsequently causing the air spout to the left of it to no longer spout air that blocks you from progressing - this is another mechanic that features in puzzles in Air's Rock. Go up and let the path take you to a similar puzzle, where you are to hop to the left of the pillar, push it one space right, then positioning yourself one space right of the right air spout, cast the Move Psynergy to move the pillar back one space left, and now you can progress left. As you go on, ignore the inactive Moai head and Wind Stone, but you can move a solitary earth pillar several spaces down into the square indentation in the ground to form a shortcut between this area and the floor's entrance. Before hopping across the earth pillar, go southwest and push another earth pillar blocking an air spout right. Then when you hop the earth pillar, go down, slide down the wall slide, climb left, and the path to the exit out of the room to the left is now open.
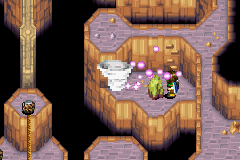
The rotating pathway to the upper left is rotated by casting Whirlwind on a whirlwind stone like this.
Now back in the gigantic room, follow the path left to the other door that has a tile marked with three blue dots (indicating you are now in the "Blue Side" of the dungeon). In the next room, climb down to the Wind Stone and use it to blow a large whirlwind to the left, which will cause a rotating feature in the center of the room to rotate 90 degrees - allowing you passage left. When you climb up to a fork leading up and left, first take the left path, which takes you to a Wind Stone above the rotating path which you are to use with Whirlwind to rotate the path again. Then return to the fork and go up, and when you get to a tightrope leading right, you can go right to push an earth pillar one space right, then return and hop downward across the rotated path. You are led to the room's exit down to the Blue Side's floor #4.
Upon climbing down the stairs onto the tile with four blue dots, take the left fork to get to a chest containing an Elixir, then take the upper fork, which linearly leads you around until you get to a relatively enclosed area with a Wind Stone below and a tightrope leading up. Use the Wind Stone to blow a large whirlwind up to rotate another rotating path 90 degrees, then cross the rope and the rotated path upward to lead you to a Wind Stone on the upper right. Use that to blow a large whirlwind left to re-rotate that path, and cross it left. Hop down to the top of an earth pillar next to a tightrope leading down, and let the tightrope take you to a winding, linear path that leads to the room's southeast exit.
Once again back in the gigantic room, use the wall ladders to climb down all the way to the base of the room, then take the stairs down to the basement level room, which unlike the rest of Air's Rock is purple and has a giant, re-usable Psynergy Stone at the center, which you should use to replenish your PP after curing your party's HP. Exit off the room's top-center staircase, and hop right across the top right platform next to the gigantic Moai head to lead you back to Air's Rock exterior, where you can push an earth pillar one space left. Reenter the door (note that when you do this, when you cast the Retreat Psynergy in the dungeon's interior you will now be deposited at this spot) and now hop your way to the purple whirlwind formation below the giant Moai head. Using Whirlwind here will cause the small Moai head below to activate, and riding its spouted whirlwinds will take you all the way back to the top floor of Air's Rock's interior. Use Whirlwind again on another purple whirlwind formation you see here, and what you see happen with the small, grey Moai head statue to the upper right happens to several others in the dungeon. This has been the ultimate "point" of starting on and progressing through the "red side path". Now cast Move to move the left earth pillar left, hop left and down, and go counter-clockwise to the now-active whirlwind-spouting moai statue. Let its whirlwind take you to a chest containing a Vial, then deal with the earth pillar above you with Move, then go clockwise to the stairwell to the upper left, and return to the original second-floor "main fork" with available "red" and "blue" paths to take.
A battle in the interior of Air's Rock.
Before going down the blue-side stairwell to begin the other dungeon path through Air's Rock, go down the red-side stairwell again - the Summon Tablet that was seen earlier can now be collected. Because this dungeon path's first room was already solved, now just go southwest, hop down and left across the log pillar, and go down the stairs to the upper left. Now you are in the room with the Summon Tablet. Make you way through the room all over again until you get to the lone earth pillar that can only be moved horizontally, and move it one space right. Go upward until you get to a small Moai-head spouting whirlwinds to the left - this statue was inactive earlier - and ride the whirlwind to reach the Wind Stone. Use the Wind Stone to blow a large whirlwind downward, and you should find that the earth pillar you moved earlier will now be transported down across the room to a new position. Make your way all the way back down to where this earth pillar now is, push it two spaces right, and you may now claim the Flora summon sequence. Now return to the main second-floor fork.
The "Blue Side Path"
Riding a small whirlwind spouted by a small moai in the most expansive chamber inside Air's Rock. The large moai below can take you to the top part of the interior.
At the main fork at the top of the gigantic room, enter the left door marked by two blue dots. In this new room, before letting yourself get carried off by the small moai head statue blowing whirlwinds left, climb down and push an earth pillar two spaces left into a square indentation in the ground. Then after riding the whirlwind, hop onto this earth pillar and go up to where a whirlwind-spouting Moai-head statue can itself be moved up or down. Move it seven spaces up, stand in the way of its whirlwind, and you will be deposited near a chest containing the Clarity Circlet, a very useful piece of equipment for Sheba. Now get back to the movable Moai-head statue and move that three spaces down, and now when you ride its whirlwind you will be deposited to where you can progress down. After pushing an earth pillar two spaces right, take the left fork, and hop across the miniature maze of platforms so that you face an earth pillar blocking an air spout. Use Move to move the pillar one space left, then retrace your steps to the fork, and go down and into the stairwells into the Blue Side's floor number 3. In this room, there are no puzzles to solve and the stairwell to the Blue Side's floor number 4 is reachable by following a fully linear series of paths and tightropes, so do that.
In the next room, there is a Wind Stone to the left and a sand wall to the right. Use the Wind Stone twice, creating large whirlwinds that are sent right and downward; this clears the sand wall and repositions the whirlwind-spouting moai head statue to further below. Now go through where the sand wall was and climb and go downward, then climb up to where the Moai statue now is and ride its whirlwind to a chest on the right containing 666 coins. Slide down and climb up to the downstairs stairwell (pushing the earth pillar to the upper right is completely optional), and go downstairs to the Blue Side's floor number 5.
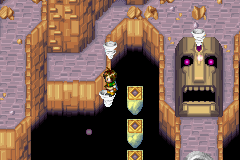
At the end of Air's Rock, the ultimate reward is the Reveal Psynergy.
In the next room, there are two long parallel pathways going up. Go up the left one, collecting the chest with the Vial along the way, then go to the top of the area and use Move to remotely move the whirlwind-spouting Moai head statue one space right. Backtrack all the way down, and now the long path to the right can be crossed without incident. You will go down the stairwell to the Blue Side's floor number 6, which subsequently leads you down out of another door back into the gigantic room. Climb down the wall ladder, and ride the whirlwind of the Moai head statue pointed right to fly all the way across to the right side of the chamber. Climb up the wall ladder above, and you will eventually hop your way into the grayish structure at the center of the chamber that is the "heart" of Air's Rock. Enter the structure's door.
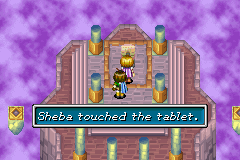
In this final room, where a purple, foggy void is underneath, hop up the center set of platforms to the center stage where a stone tablet reposes. Interact with it, where it says "Wielder of Wind's might... Lay your hands upon this stone. We bestow upon thee the power to see the truth unclouded...", and through a brief cutscene with Sheba, she is empowered by the stone to permanently gain the Reveal Psynergy, the final and most important reward of the Air's Rock dungeon. Now take the left-hand path of platforms, then when you get to a circle of platforms, cast the new Reveal Psynergy to show an otherwise invisible platform that you can hop across (all circle-arranged elements in the Golden Sun games have something to hide within them that can be seen with Reveal). Hop across it to access a chest containing a Psy Crystal. Return to the center stage at the top and now take the right set of platforms, using Reveal to cross a circle of platforms you come across there, and make it to the room's bottom exit. The Retreat Psynergy couldn't work in this room, but can work outside of it, so once you are out of the dungeon's heart, cast Retreat to appear at an exit from the dungeon's interior, cross out into the dungeon exterior, and use Retreat again to appear at the bottom of the sandy base of Air's Rock, where you can now exit to the world map. With this done, the Air's Rock dungeon is finally complete, and the Reveal Psynergy can now uncover all sorts of important secrets through the rest of the game, such as in the town of Garoh.
Enemies
Air's Rock has two bestiaries: one for the exterior area and one for the interior area.
| Bestiary of Air's Rock (Exterior) | ||||||||||
| Monster Name | LVL | HP | ATK | DEF | AGI | EXP | Coins | Weakness | Drop | Drop Rate |
| Dino | 10 | 82 | 84 | 23 | 35 | 40 | 39 | 1/16 | ||
| Emu | 11 | 98 | 89 | 21 | 46 | 53 | 51 | 1/32 | ||
| Ghoul | 12 | 99 | 93 | 20 | 16 | 34 | 42 | 1/16 | ||
| Harpy | 12 | 105 | 104 | 25 | 46 | 38 | 53 | 1/16 | ||
| Kobold | 10 | 77 | 80 | 17 | 47 | 40 | 45 | 1/16 | ||
| Mimic (unique) | 17 | 431 | 126 | 33 | 77 | 272 | 241 | 1/1 | ||
| Bestiary of Air's Rock (Interior) | ||||||||||
| Monster Name | LVL | HP | ATK | DEF | AGI | EXP | Coins | Weakness | Drop | Drop Rate |
| Creeper | 12 | 89 | 79 | 19 | 29 | 32 | 38 | 1/32 | ||
| Emu | 11 | 98 | 89 | 21 | 46 | 53 | 51 | 1/32 | ||
| Ghoul | 12 | 99 | 93 | 20 | 16 | 34 | 42 | 1/16 | ||
| Harpy | 12 | 105 | 104 | 25 | 46 | 38 | 53 | 1/16 | ||
| Mummy | 14 | 113 | 116 | 30 | 44 | 72 | 102 | 1/32 | ||
Collectibles
Exterior Portion
![]() Cookie: In a chest roughly in the center of the very first screen.
Cookie: In a chest roughly in the center of the very first screen.
![]() Fujin Shield: In a chest in the lower right of the mountain's summit.
Fujin Shield: In a chest in the lower right of the mountain's summit.
![]() Sleep Bomb: In a chest in the second screen above the ground level.
Sleep Bomb: In a chest in the second screen above the ground level.
![]() Smoke Bomb: In a chest in the lower left of the very first screen.
Smoke Bomb: In a chest in the lower left of the very first screen.
![]() Storm Brand: In a chest in the upper right of the very first screen, reached by climbing down from the screen above.
Storm Brand: In a chest in the upper right of the very first screen, reached by climbing down from the screen above.
![]() Vial: In a chest in the screen above the ground level, near a door connecting to the interior and reachable only by casting Frost on a puddle below it. This requires Piers to be in your party, so unless you're playing this dungeon after recruiting Piers in Kibombo you most likely would have to remember to come back here later for this.
Vial: In a chest in the screen above the ground level, near a door connecting to the interior and reachable only by casting Frost on a puddle below it. This requires Piers to be in your party, so unless you're playing this dungeon after recruiting Piers in Kibombo you most likely would have to remember to come back here later for this.
Interior Portion
![]() Reveal: The ultimate reward of Air's Rock; Sheba learns this Psynergy spell upon inspecting a stone slab in a room with a cloudy purple background.
Reveal: The ultimate reward of Air's Rock; Sheba learns this Psynergy spell upon inspecting a stone slab in a room with a cloudy purple background.
![]() Flora: A summon tablet located in the "path" down the dungeon interior reached by the eastern entrance (marked by two red dots on the floor) from the top of the interior. It can only be reached once the dungeon's dormant whirlwind-spouting Moai statues are "turned on", which is achieved at the end of said eastern "path", so after doing so, return to this room and solve a new puzzle that has appeared.
Flora: A summon tablet located in the "path" down the dungeon interior reached by the eastern entrance (marked by two red dots on the floor) from the top of the interior. It can only be reached once the dungeon's dormant whirlwind-spouting Moai statues are "turned on", which is achieved at the end of said eastern "path", so after doing so, return to this room and solve a new puzzle that has appeared.
![]() Clarity Circlet: In a chest in the path down the dungeon interior reached by the western entrance (marked by two blue dots on the floor) from the top of the interior.
Clarity Circlet: In a chest in the path down the dungeon interior reached by the western entrance (marked by two blue dots on the floor) from the top of the interior.
![]() 666 Coins: In a chest in the path down the dungeon interior reached by the western entrance (marked by two blue dots on the floor) from the top of the interior.
666 Coins: In a chest in the path down the dungeon interior reached by the western entrance (marked by two blue dots on the floor) from the top of the interior.
![]() Elixir: In a chest in the path down the dungeon interior reached by the eastern entrance (marked by two red dots on the floor) from the top of the interior.
Elixir: In a chest in the path down the dungeon interior reached by the eastern entrance (marked by two red dots on the floor) from the top of the interior.
![]() Psy Crystal: In a chest in the purple room at the end of the dungeon where the Reveal Psynergy is gained.
Psy Crystal: In a chest in the purple room at the end of the dungeon where the Reveal Psynergy is gained.
![]() Vial: In a chest in the first screen entered from the top of the exterior. Reachable only by "turning on" the dungeon's whirlwind-spouting Moai by casting Whirlwind on the nearby whirlwind monument.
Vial: In a chest in the first screen entered from the top of the exterior. Reachable only by "turning on" the dungeon's whirlwind-spouting Moai by casting Whirlwind on the nearby whirlwind monument.
![]() Vial: In a chest in the path down the dungeon interior reached by the western entrance (marked by two blue dots on the floor) from the top of the interior.
Vial: In a chest in the path down the dungeon interior reached by the western entrance (marked by two blue dots on the floor) from the top of the interior.
Trivia
- Air's Rock is also referred to as Windy Peak within Osenia.
- Air's Rock is both named and modeled after Ayers Rock, a real life rock formation located in the heart of Australia. It is also worth noting is that Osenia, the continent Air's Rock is located on, is the Golden Sun-equivalent of Australia.
Glitches
It is possible to get an early/infinite Sol Blade in Airs Rock via the Retreat glitch.
Step 1: Set the front entrance of the Air's Rock core (the door inaccessible until coming from inside and moving the log) as your Retreat point.
Step 2: Walk to the psynergy stone on the Yellow 1 floor.
Step 3. Trigger the Retreat glitch. This involves setting Retreat as a shortcut and attempting to cast it when Felix does not have enough PP.
Step 4: Examine the stone. It should be a Sol Blade.