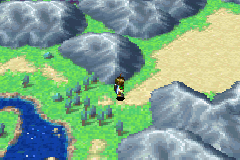
The entrance to Yampi Desert, as it appears on the overworld.
Yampi Desert is a desert in the western portion of Osenia. In the general sense, it is a major crossroads of the continent, and travelling through it is initially the only way to reach the town of Alhafra north of it in Golden Sun: The Lost Age.
Several important items and events occur here: you can get the Trainer's Whip, a Jupiter Djinni, the Guardian Ring, and the Scoop Gem as a reward for the boss encounter with the King Scorpion.
Late in the game, when you have the Sand Psynergy you can access a secret cave entrance, and if you have the Teleport Psynergy you can explore a major optional dungeon within that cave called Yampi Desert Cave.
Walkthrough[]
Upon entering the desert from its western entrance, go right until you get to a sandy fork leading left and down, and go down. Follow the path until you find a chest enclosed by a wooden pillar; simply use Pound on the pillar to open the chest containing the Guardian Ring - the only ring in either Golden Sun GBA game that is equipped for statistics boosts rather than having a Use effect. Its boosts to HP and Defense make it a perfect fit on Sheba. Continue on east into the next screen, where a large group of NPCs stand around idle; this screen can sort of be thought of as a "lobby room," because the path to the southeast leads to a portion of the desert serving as its own little dungeon, and the northern exit, accessible later on, leads through the other portion of the desert that actually contains the other exits of the overall location. Take the southeast path into the next screen to the right.
King Scorpion areas[]
Blitz is reached only by Pounding certain pillars while leaving certain other pillars standing to hop across.
In the first screen of this "sub-dungeon" area, Pound the wooden pillar immediately visible, then beyond that go all the way to the right and pound the lone pillar. In the part of the screen you gain access to is a chest containing an Antidote, as well as two pillars against different parts of the northern wall. Pound the right pillar to access a climbable portion of wall, then hop across the pillar to the left, go down, hop across the pillar to the right, then on the elevated "island" with two bushes on it, go down and hop down once and left twice to another elevated island with two bushes. Go down and hop right across a lone pillar to get to an elevated island containing a Jupiter Djinni, which you must defeat in battle to earn. By all means, save before battling it, because if it runs away during the battle, you would have to leave and reenter the screen and repeat all of the above steps to get back onto the Djinni's island. After earning the Djinni, slide down, pound the immediately visible wood pillar, and go east beyond that to where you can slide down into a sandy part of the screen. Exit off the right side of the screen.
In the next small screen, there is a Psynergy Stone to replenish all of your PP with. Pound the central of the three wood pillars and climb up the wall ladder it hid, then exit off the top of the screen. You enter the first of three similar screens that feature a unique puzzle: A lump of sand moves between four pre-pounded pillars and underneath an unpounded pillar in a regular fashion, and it always redirects its course to its right in a 90 degree angle whenever it comes into contact with a pounded pillar. Cast Pound on the lone pillar here, and when the lump comes into contact with it, its course is redirected so that it exits off the right side of the screen, briefly showing itself as a red scorpion creature.
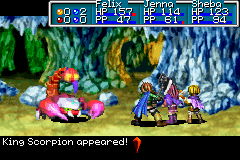
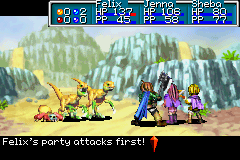
Battling the King Scorpion boss.
Follow the scorpion into the second screen, where it is again a lump of sand traveling around between pounded pillars, and there is one pillar to pound. This time, timing is critical, because if pounded at the wrong time, the scorpion's path will be redirected into a tightly enclosed route and you will have to leave and reenter the screen in a puzzle reset. Cast Pound when the lump is right below the pillar so that it will be redirected north into the next screen. In the third screen, there are two pillars to choose from; cast pound on the lower right pillar right as the lump passes through its tile from right to left to redirect its course into the sandy pool at the top of the area. Approach the pool to automatically be transported down below and trigger the game's second boss fight, the battle against the King Scorpion. It can be tough depending on how you have played thus far, but when you win you earn the Scoop Gem, which bestows the critical Scoop Psynergy. Use Scoop on the single tile in the center of the room to return to the surface. Now you can cast Retreat and return to Yampi Desert's entrance.
Route to Alhafra[]
Return to the "lobby area" where all the NPCs are, most easily reached by casting Retreat and going through the first screen again. Now, go to the bottom portion of the screen where there is a single spot of sand within four stones, and use Scoop on that spot to reveal a ladder. Follow the subsequent underground cave trail and emerge back out into a different part of the same screen as the NPCs, and climb up the wall ladders to the right of the oasis and head left. As you pass left, the NPCs notice you on the elevated area and a brief cutscene triggers, and all the NPCs relocate to the oasis behind you. Proceed up the exit to the north into the next screen,which is mostly featureless, except for a sole sandy spot to the lower right of the screen. Scoop this spot for 315 Coins and another near the cave entrance to receive a Nut. Enter the cave at the upper end of the area.
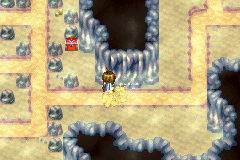
Riding the sand rivers in a cave area.
The cave area you find yourself in features a maze of flowing sand rivers essentially divided into two halves. Step onto the river and ride it until you step onto the solid ground immediately above the top central part of the vaguely squarish left half of the sand river maze, and run right across the lone sand river feeding this part of the maze. At the right half of the sand maze, ride the sand river all the way back to the left half, along the way running up to the chest just near the left half. Claim the Hard Nut, then return to the start of the right half via the steps outlined above. You are to run north across the sand river flowing down in a sort of zig-zag pattern, then when you get to the part where a chest is behind a wooden pillar, run into the one bare tile enclosed by three rocks just to the left of the pillar, point toward the pillar, and remotely Pound it, opening the way up to the chest containing the Blow Mace, the strongest weapon you'll probably have yet. Ride the river southeast and run right through the opening between rocks at the eastern part of the second half, climb down the ladder to the right, and exit out of the cave exit to the lower right. Follow the subsequent sandy path to the next screen.
The large and feature-filled area you come into is essentially the "last" screen of the dungeon, because its upper right exit leads to the part of the overworld where Alhafra is while the lower right exit leads to a cave trail that deposits you into a part of the overworld just above the desert-like area where Air's Rock is located. First, climb down the ladder below your position, and walk through the twisty lower-level sandy portion of the screen all the way to its right end, and climb the wall ladder. Run left across the sand-fall, and left across the top part of the next one. Here, the path branches up and down; head down, use Lash on the coiled rope to the left, climb up the tied rope, then at the sand-fall source you come across, ride the sand-fall down from its right side and immediately step right to get to the elevated area with a chest containing the Trainer's Whip, one of the three class changing items in the game. Ride the sand-fall back down to the lower-level portion, and return to the branch described previously.
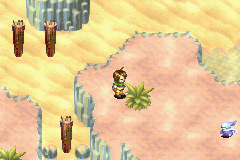
A battle in the exterior desert areas of Yampi Desert.
At the branching path to the left of the two eastern sand-falls, climb up the wall ladder to get to the sources of the two sandfalls. Standing in between the two sandfalls, run across the narrow area above the lone rock below the right sand-fall's source so that you can fall down the sand-fall via its right side, and run right to the upper left exit of the desert.
All of the above outlined steps are the method through which a party enters Yampi Desert from its western entrance and exits out of its northeastern entrance, which is necessary to reach the next important destination in the game, Alhafra. Once it is time to leave Alhafra, the only way back to the overworld proper is through Yampi Desert again, and one takes the short path to its southeast exit like so: From the upper right point of the large screen that you appear in when you enter Yampi Desert from its northwest entrance near Alhafra, go down the thick path immediately below until you get to a point where a sign warns that beyond this point, "there is no route back." Ride the sand-fall down, and follow the linear path through a cave back out into the overworld. If you have the Reveal Psynergy, the circle of stones you come across contains a Psynergy Stone.
Secret entrance to Yampi Desert Cave[]
Near the end of the game, when you have both the Sand Psynergy from Gaia Rock and the Teleport Psynergy from Mars Lighthouse, a previously inaccessible cave entrance within the large screen at the end of Yampi Desert lets you into the optional late-game dungeon, Yampi Desert Cave. To get there, enter Yampi Desert through its northeast entrance (Teleport to Alhafra to reach there the easiest), and go down into the lower sandy portion of the screen. Note the two sets of nine rocks in this area; when you use Reveal on the east set of rocks, it reveals a chest containing a Lucky Medal, while the west set of rocks appear configured as a directional arrow pointing northwest. This is meant to hint at the cave entrance's existence at the upper left part of the area. Reach back to the left end of the screen, step onto the sand-fall in front of you, and use Sand to travel up the sand-fall underneath the three rocks at the top of the sand-fall and reform near the sand-fall's source. The cave entrance can now be accessed, and the dungeon beyond can only be accessed with Teleport.
Enemies[]
| Bestiary of Yampi Desert | ||||||||||
| Monster Name | LVL | HP | ATK | DEF | AGI | EXP | Coins | Weakness | Drop | Drop Rate |
| Dino | 10 | 82 | 84 | 23 | 35 | 40 | 39 | 1/16 | ||
| Emu | 11 | 98 | 89 | 21 | 46 | 53 | 51 | 1/32 | ||
| Gnome | 11 | 85 | 73 | 15 | 38 | 29 | 40 | 1/32 | ||
| Kobold | 10 | 77 | 80 | 17 | 47 | 40 | 45 | 1/16 | ||
| Momonga | 10 | 53 | 66 | 16 | 51 | 29 | 31 | 1/32 | ||
| Spider | 11 | 69 | 75 | 22 | 22 | 25 | 32 | 1/16 | ||
| Jupiter Djinni (Blitz) (unique) | 11 | 267 | 65 | 17 | 50 | 109 | 126 | N/A | N/A | |
| King Scorpion (boss) | 18 | 1064 | 101 | 32 | 39 | 440 | 228 | 1/1 | ||
Collectibles[]
![]() Blitz: On one of the elevated portions of a large screen, reachable by Pounding certain brown pillars while leaving certain other pillars standing so you can cross them on top
Blitz: On one of the elevated portions of a large screen, reachable by Pounding certain brown pillars while leaving certain other pillars standing so you can cross them on top
 Antidote: In a chest in the upper left area of the large area where the Jupiter Djinni can be found.
- Blow Mace: In a chest in the indoors cave area with the rushing sand streams.
- 315 Coins: In the screen north of the screen with a small oasis, cast Scoop on the lower-right spot among the sand.
- Guardian Ring: In a chest in the first screen from the west entrance into the desert, right behind a Poundable pillar.
- Hard Nut: In a chest in the indoors cave area with the rushing sand streams.
- Lucky Medal: In an invisible chest in the center of a square-shaped set of nine stones; use the Reveal Psynergy to get it.
- Scoop Gem: Acquired as a reward for defeating the King Scorpion boss.
- Trainer's Whip: In a chest in the area with the sandfalls that has the desert's eastern exit.
- Water of Life: In a chest in the cave entrance to Yampi Desert Cave, reachable with the Sand Psynergy.
Trivia[]
- Yampi Desert is perhaps the only location in the Golden Sun series that has three distinctive, separate entrances/exits located on the world map. Its western entrance is reached a short ways southeast of Osenia Cliffs, its north entrance/exit is right below Alhafra, and its south entrance/exit is north of Air's Rock farther east. This last point is generally an exit, though, since it cannot be used as an entrance into Yampi Desert (until much later in the game at least) because of a cliff with a sand-fall blocking the way. This sand-fall can be climbed up with the Sand Psynergy, but this is hardly useful as a "shortcut" to anything.
- Incidentally, if you have a cheat device that lets you walk across the area of Angara explored in the original Golden Sun where you can walk into the northeast entrance of Lamakan Desert, you will suddenly enter Yampi Desert as though you entered it from its northeast Alhafra-side - an interesting piece of leftover code on Angara, considering that all the other areas on Angara that would have entered you into locations in the first game were removed completely and keep you on the overworld map.